

The cardoon is a vegetable of the Asteraceae family.
Key cardoon facts:
Name – Cynara cardunculus
Family – Asteraceae
Type – vegetable
Height – 2 to 6 feet (0.60 to 2 m)
Planting distance – 3 feet (1m)
Exposure – full sun
Soil: rich and cool – Planting: mid-spring – Harvest: from summer to fall
There are two types of cardoon: thorny varieties and thornless ones which only have very few thorns. Today, thornless varieties are more grown and cultivated.
Cynara cardunculus ssp. cardunculus is native to the Mediterranean area. Cardoon grows into wide clumps that have large, lobed leaves with fleshy stems called stalks. Cardoon tastes very much like artichoke, though it’s a bit more bitter.
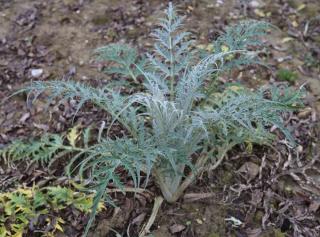 Seedlings are started in a cold greenhouse, either in a tray or in individual nursery pots, as early as April.
It’s also possible to sow directly in the ground mid-May, if the soil has warmed up enough.
Lead time: on average, about 5 months are needed between sowing and harvest.
Sow your cardoon seeds in rich and well drained substrate. After sprouting, thin to only keep the most vigorous ones. If you started your plants in nursery pots, keep just a single plant per pot.
Sow 3 to 4 seeds per seed hole, in soil that’s enriched with ripe compost. Water your seedlings abundantly until they sprout. After each plant has produced three leaves, thin to only keep the nicest seedlings, 1 per 3 feet squared (1 m²).
From the seedling stage, cardoon seedlings are transplanted to the ground when they have about 3 leaves. Do this after the last frost date, which is usually mid-May in most areas. Note that it’s also possible to start sowing and planting seedlings in the previous year, in fall: this helps seedlings spread roots during the winter.
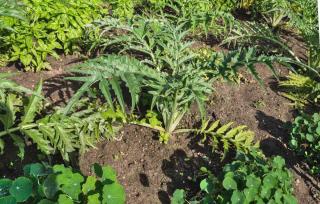 Plant your cardoon sprouts in holes 8 to 12 inches deep, filled in with soil amended with compost or manure.
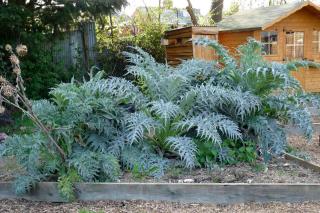 Cardoon plants require frequent hoeing, weeding and watering. Not much water is needed, but the more frequent, the better, especially in times of drought.
Cardoon is a vegetable plant that loves it when the soil is always cool. As a result, a key success factor is to mulch the base of each plant with either dried leaves or dried lawn clippings (not fresh ones).
 Cardoon hardiness
Not a hardy plant, you’ll have to protect your cardoon over winter with a thick layer of natural mulch.
Its average hardiness is about 20°F (-7°C). In colder areas, it must be grown as an annual.
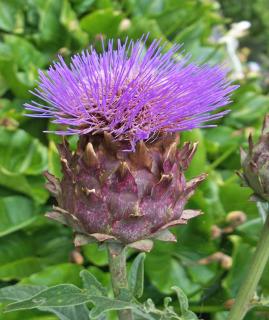
Cut the (very ornamental) flower scapes to keep the plant from wasting energy on blooming and seeds, except for a few of the nicest specimens that you select to produce seeds for next year’s crop.
Snails and slugs particularly love young cardoon sprouts. When young, it also attracts black aphids that lodge themselves on its leaves and crown.
Cardoon stalk harvest takes place between summer and fall, after a 3-week “blanching” period. Harvest each cardoon stalk by cutting them at the base with a knife.
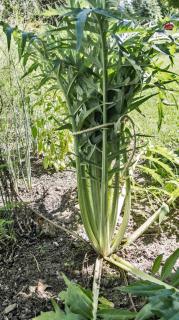 Since it takes about 3 weeks for cardoon stalks to turn white, you have to prepare this stem in fall.
Anticipate your culinary needs by about 3 weeks, and count how many clumps you need to cover so that they’re ready to harvest three weeks later.
Blanching is a step that’s necessary before the harvest: practically speaking, the goal is to keep the leaves and stems in the dark for about 3 weeks to have whiter, softer stems.
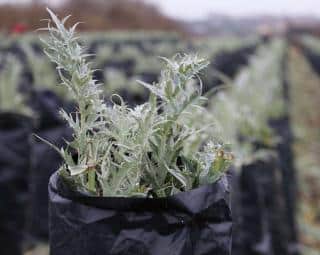 With either a mulching tarp or simple cardboard, wrap each cardoon clump to block light from reaching the lower 3/4ths.
Eat quickly after the harvest. Wrapped in a cloth or paper towels, stalks will keep for only a few days at most in the vegetable compartment of your refrigerator. Another option is to pull the entire clump out with its root ball. Store it in the dark for the entire winter if need be.
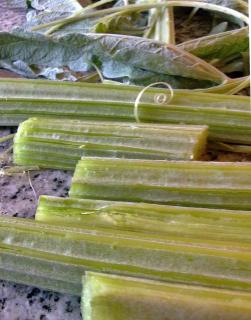 The delicate aroma of cardoon stalks pairs well with many recipes. Prepare them by dipping them for a few minutes in salted boiling water with a dash of lemon juice: blanching (that’s the other “blanching”: the cooking one).
Once that’s done, bake them, mash them, or steam them and sauté them in a pan to pair with meats. Also delicious with tomato or bechamel sauce.