
Preparing oleander cuttings is very easy to do, and you’ll be able to propagate your oleander in a simple and cheap manner.
Collect a stem from your shrub, place it in a vase and then in a pot with soil mix, and you’ll be guaranteed that new roots appear: a new oleander is born!
Follow our advice to succeed in preparing an oleander cutting.
Traditionally, oleander cuttings are prepared in August. This is the time you’ll have the highest success rate, since the shrub has just finished its spring vegetation phase.
It also makes it possible for the cuttings to grow enough that they can be transplanted to the ground in fall.
But it is also possible to start preparing cuttings in June, and even into the month of September if the conditions allow.
Collect a cutting

Not all sprigs are suited to becoming cuttings.
The best are the stems that have not flowered, neither too young nor too old, their wood must not yet have hardened.
They should be between 6 and 8 inches (20 cm) long.
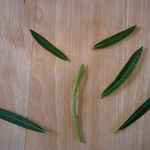
Removing the lower pairs of leaves

With a hand pruner or a sharp knife, remove all the bottom leaves, keeping only the top leaves.
It is always best to heat your tools or rub them with alcohol beforehand to sterilize them.
.
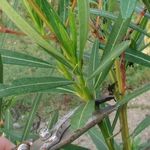
Look at the picture on the right: the three topmost leaves are just about to unfurl.
Split the base of the stem

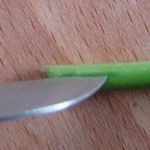
Slice the bottom of the stem open by just a few millimeters (maybe 1/8th inch).
For this, use a blade knife or a very sharp knife, preferably sterilized so as to not contaminate the cutting.
This easy step greatly speeds up root formation, since the surface area that mingles with mineral elements and nutrients is increased.
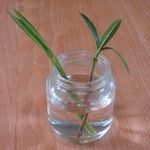
Let the cutting or cuttings sit in water

Change the water in the glass once or twice a week, to replenish the organic matter the plant needs.
This step isn’t mandatory since you can also directly stick the cutting in a pot filled with soil mix.
But it has been shown that thanks to this soaking phase, your chances of success increase.
Plant cuttings in soil mix
Once the sprig has produced a bunch of roots, the time has come to pot it.
This step must be proceeded through carefully, since the root system at this point is still very fragile and should not be bruised or broken.
Take great care in planting this cutting into soil mix, preferably special cutting soil mix.
If you plan to place the cutting directly in soil mix without going through the soaking phase, it helps to dip the cutting in powdered rooting agent.
This will speed regrowth.
Keep the soil mix moist for several weeks
It is important to keep a high moisture level during the root growth phase.
But take care not to drown the cutting, or it might rot.
Watering should be regular, but in small amounts.
Keep the cuttings protected from freezing all winter long
If you prepared your cutting at the beginning of summer, and that it has already grown significantly by fall and that winter is usually mild in your area, you can plant it directly in the ground in fall.
However, if it isn’t the case, it is best to keep your new plant in a pot under shelter over winter.
In fall, repot in a slightly larger pot and place it in a well-lit place, cool but where it doesn’t freeze.
You can reduce watering frequency and wait for the soil to be dry before watering again.
Transplant in the ground in the following spring
When the last frosts are past, you can place your plant in a large pot outdoors, or plant it to the ground directly in your garden.
Once again, go through the works of preparing a blend of garden soil and planting soil mix or flower plant soil mix, since the beginning is when it will need nutrients to grow.
Water regularly taking great care to not flood the roots because oleander is vulnerable to excess moisture.
Read also: