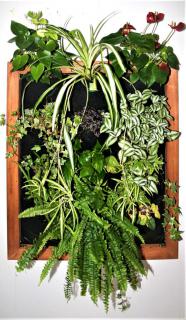

Tiny apartments or one-room studios can also be home to rich plant life. Even if you don’t have a single flat countertop or windowsill to place your nice pots and containers! An amazing indoor plant wall is something you can create that will bring green and color to your home without gobbling any floor space up.
This easy-to-build plant wall frame is just the thing for you. Building it is quite straightforward, and populating it is a lot of fun. This particular set uses traditional and less conventional indoor plants that will impress your guests, bring joy to your days and purify the air you breathe!
→ Many thanks to Nature & Garden contributor Mick Rogers for sharing his project.
→ More on setting up plant walls (along stone walls, too)
Use the vertical planter, while still empty, to select the emplacement where you plan to hang your living green wall planter. Ensure you’ve got sufficient light, and if needed provided supplemental lighting in areas where winters are darker.

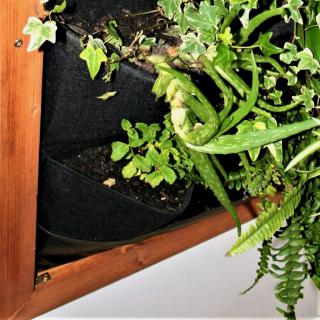
It’s important for the frame to overlap the fabric planter edging so that the frame keeps the planter from bulging out when full. Use the screw plates to assemble the corners, and longer screws can be added to ensure the whole is sturdy.
Usually two wall fasteners like screws or hooks are needed to hang the indoor plant wall. It’s recommended to assemble the wall planter and fasten it to the wall before filling it in with soil, plants and water.
The vertical planter includes a mesh fabric that ensures that water circulates well. Soak it in water for a couple hours and you’ll jump-start the process, making the fabric moist and welcoming for your plant’s roots.

Break the clump up with your fingers to ensure roots don’t circle around each other. Place your plants in the pockets and back fill with soil mix. Press the soil down in the pockets so that they’re really nice and full, or else they’ll fold in at places, which doesn’t look very nice.
Arrange your plants so that specimens that require well-drained growing soil are towards the top. Plants that love moist, damp and even wet soil are in the bottom-most pouches. Sedge is a great example of a plant that will thrive in the bottom pouches, as are ferns which are showcased in this project.
You can fill the lower pockets with soil mix almost to the brim, but leave about an inch (2.5 cm) in the top ones. This serves to retain water when watering: if the pocket is too full, water will dribble over and create a mess.
After the initial soaking of the living plant wall before packing the soil and plants, you’ll only need to water once or twice a week. Simply pour water in the topmost pockets, and it will seep down to moisten the entire mesh. Excess water will collect in the lower back-folded vinyl pouch. Don’t overwater or it will drip to the floor.
Roots will develop and normally stay within their own pockets, but plants that send runners off like strawberries and mint might try to colonize the playing field!
If some of the plants are tropical, you might want to mist the leaves from time to time. This this won’t be needed as much as for potted indoor house plants. The felt and mesh fabric channels water around and it evaporates readily, providing sufficient air moisture.
The featured project is about 1 ½ months into growing, and already several adjustments have been made. Some plants at the bottom couldn’t cope with the amount of water. It’s very easy to switch plants out and replace them. Proceed carefully to avoid dropping soil on the floor. Best is to abstain from watering for a week or so before digging the plants out.
Trimming or pruning with gardening scissors will help when some plants start growing to the point of crowding out others.
Adding fertilizer will help plants produce healthier leaves. Mix liquid leaf plant fertilizer in when watering, at most once every fortnight in summer. Reduce it to once a month in winter, when the growing has slowed. Check on the needs of each plant to ensure you don’t overdo it.
Remember that plants help soothe the mind. Set this plant wall near your prayer corner or indoor meditation garden to benefit from those good vibes!