
Ever dreamed of having a garden that stays green throughout droughts? Do your water-hogging plants keep you from taking more than a week-end off?
The solution might be right under the ground: set up a small-scale aquifer for your thirsty plants to dip their roots in!
Read also:
It’s really just as simple as it looks! The key to retaining the water just at root level for the plants lies in the hydrogel powder. With water, the water crystals expand and will nourish the plants for a long time.
Hydrogel, which goes by nearly a hundred names like water crystals, Polyter, jelly balls, Orbeez and the like, is a chemical compound that retains water by swelling when wet, and then slowly releases it to dry.
Although it sometimes comes from organic, natural sources, it’s most often synthetic, which is why there are a few precautions related to hydrogel products.
These water beads swell to absorb up to a thousand time their weight in water. It only takes a few hours, at most a day, for them to swell to maximum capacity.
What is special is that plant roots are able to drill their roots in the crystals or pearls and extract water from them, much as they would a bit of moist soil or rich humus.
This makes hydrogel ideal for watering plants because it makes water available exactly as a plant needs it while protecting it from drowning.
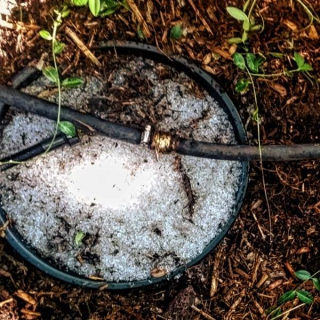
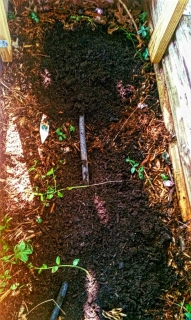
Take several good-sized basins and embed them in the growing bed. Each basin should be at least a foot across (25 cm), and you can also use windowsill containers if you want the spots of green to form a more linear shape.
Space them evenly so that all future plants have a chance to send their roots over. Some plants should be planted directly above the basin, especially taproot plants or plants with roots that dive deep. Plants with surface-running roots can grow outside the basin, around the periphery. They’ll send roots over the edge of the buried basin and will find the water reserves easily.
In this project, the basins were spaced about three feet apart (75 cm).
Throw a handful of crystal water powder or pellets in each basin and let it swell overnight. Don’t put too much or you’ll have trouble containing it when it swells with water. Providing a layer 1 inch thick – after water absorption – along the bottom is more than sufficient, even for the most thirsty plants.

But in most areas, you won’t need to irrigate at all. Indeed, with the hydrogel, rainwater will be more than enough to cover the plant’s needs even over weeks of drought!

After that, plant your flowers, bulbs, perennials as is customarily recommended.

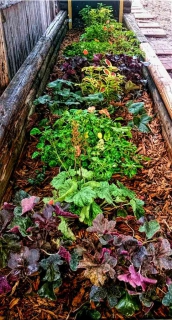
In this garden bed by Nature & Garden contributor Keith Hall, both leaf plants and flowers are showcased.
You’ll find beautiful fern (Japanese holly fern in this case), vinca minor, peperomia, coleus, coral bells and impatiens flowers at the top and center are just starting to bear flowers!