This method of bark propagation works particularly well for the mimosa tree.
It is especially useful if you wish to replace a tree that was damaged and you still have access to its remains.
Here are the tips on how to reproduce a mimosa tree from bark.
A tree grows thick thanks to the work of a surprisingly thin layer of cells. Just under the bark, a thin line of cells marks the difference between the bark and wood of the trunk.
This is called cambium. It’s virtually invisible to the human eye because it’s extremely thin.
However, since it’s loaded with nutrients and connected to the sap vessels that channel food and water up and down the tree, it takes on a shiny sheen when bark is freshly peeled from the trunk.
Mimosa often sprouts suckers from various spots along its bark. Usually, suckers are removed to ensure the tree grows nicely. In this case, this particular trait of growing is what makes this solution work.
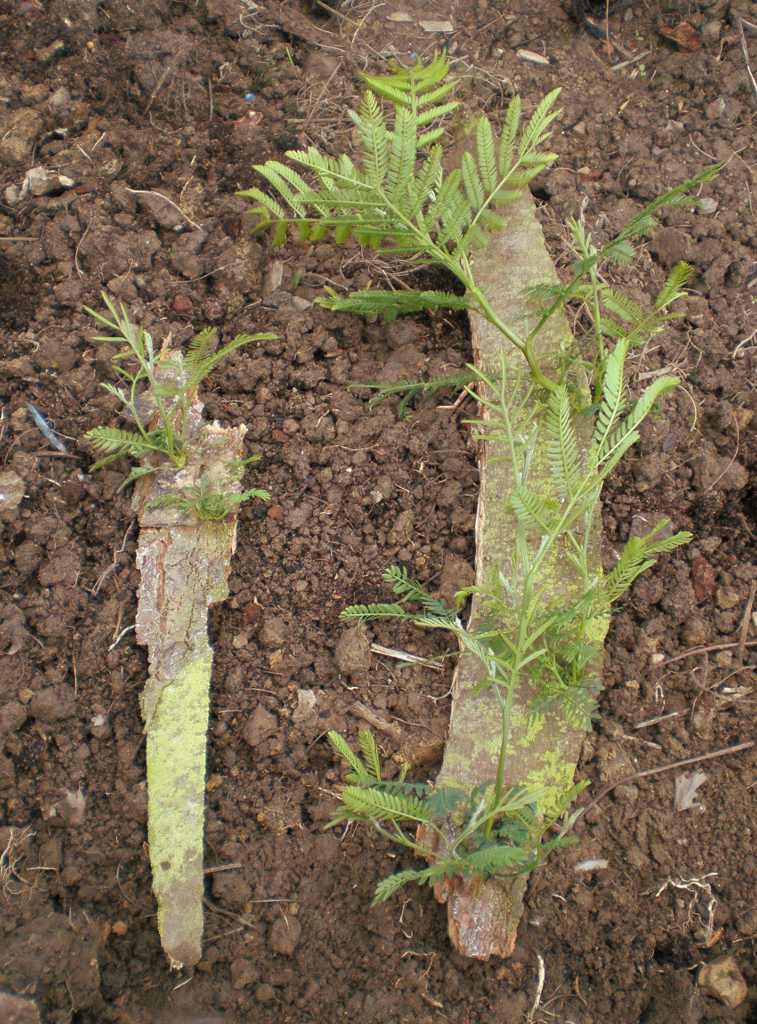
All you have to do is to recover those portions of the damaged tree, cutting them away from the trunk.
You should end up with a rectangle of mimosa bark that is about twice as long as it is tall, with the sprouting sprigs in the center.
 Place this slab of bark with the mimosa tree sprig facing up in a pot filled with a blend of garden soil and soil mix.
Ensure it drains well, for example check that the pot has a hole at the bottom.
Place the pot in a spot that gets permanent shade but is still quite luminous. Water whenever the soil is dry at the surface.
The sprouted bark will start working on producing roots. You’ll have a new potted mimosa tree up and growing in just a few weeks!
 This technique works with all varieties of mimosa tree.
Cambium is a film of cells that is only one or two cells thick. It lines the entire trunk of the tree between the bark and the wood.
It can be found in the trunk, branches and even the roots.
These cells are special in that they are undifferentiated: this means they can potentially turn into different parts of the plant.
Many living beings start out as undifferentiated cells, even we as human embryos. Some of our cells even retain the capacity to morph into whatever tissue may be needed up through adulthood.
When these cambium cells from the mimosa bark slab are set in contact with the soil, they answer the needs of the growing shoots above it. They start growing into roots that will ultimately feed and nourish the plant.
Read also:
When these have developed enough, the shoots will resume growth and this is a signal that the bark cutting can be transplanted.